Inventory Move
Step 1 – Enter Inventory Move Header
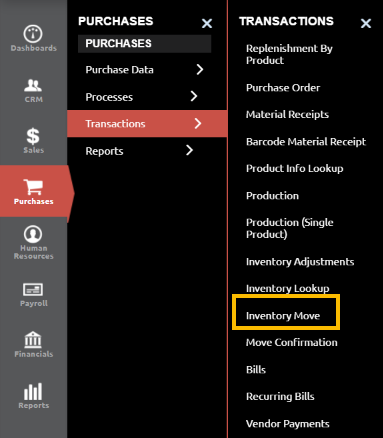
Navigate to Purchases-> Transactions -> Inventory Move
Create a new Inventory Move Header record by clicking on the ![]() Button located at the top right side of the screen.
Button located at the top right side of the screen.

Fill out the Document Number (if left blank, this will auto generate upon saving), Movement Date (when the product/s have been consumed) and Select “Material Movement” as Document Type. If there is any additional information you choose to include, add it to the description.
Clicking on the Blue Document No. Value will switch the current grid view to detail/edit view, where the Inventory Move Header information can be updated.
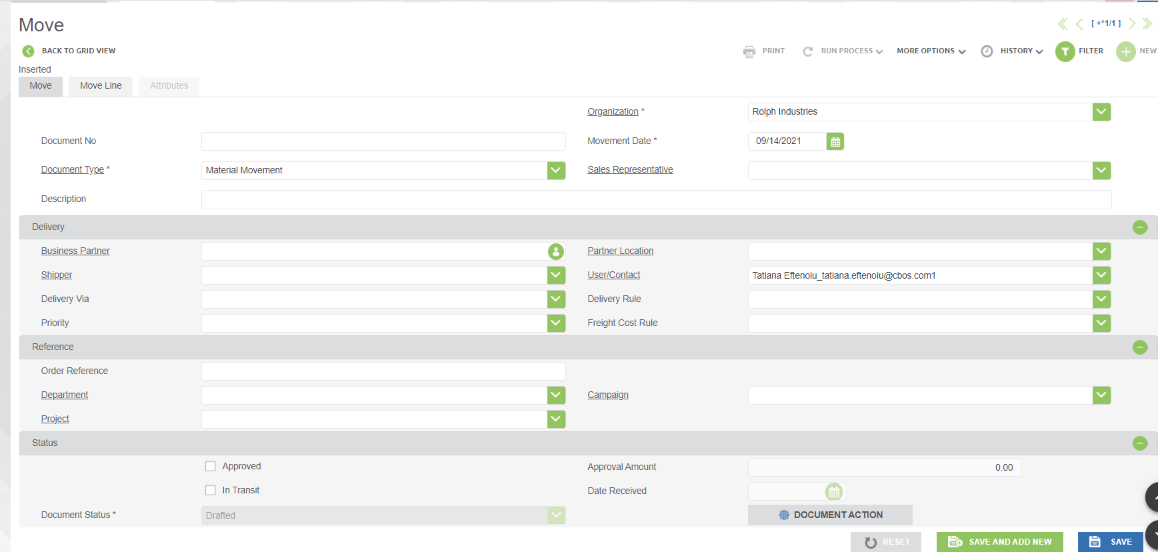
Once the Inventory Move Header record has been entered, it should remain in Drafted status until the Move Line detail information has been entered.
Step 2 – Enter Move Lines
Click on the Second Tab, "Move Line" at the top of the screen. Complete all the required fields – Product, Locator (Warehouse Locator you are moving the product from), Locator To (Warehouse where the product needs to be moved) and Movement Qty.
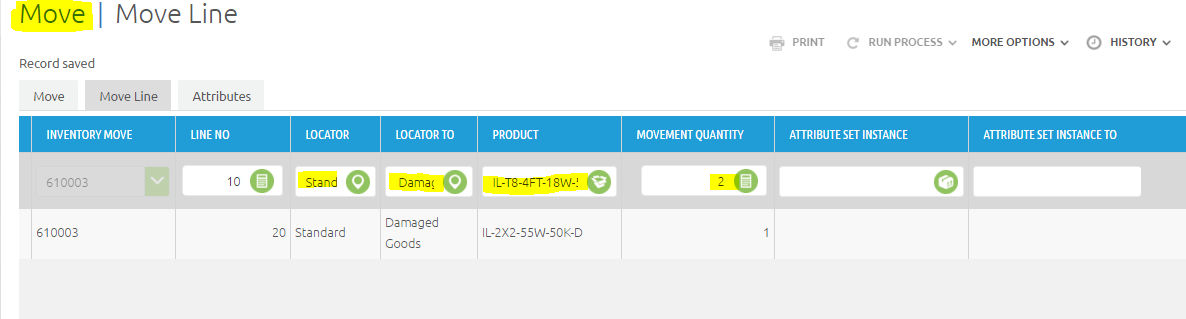
To move additional products, select additional products, or select “Save and add new” at the bottom left hand side.
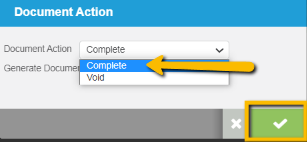
After inserting all products in the Move Line, go back to the Move Header, click on the “Document Action” of the line you created and select Complete.